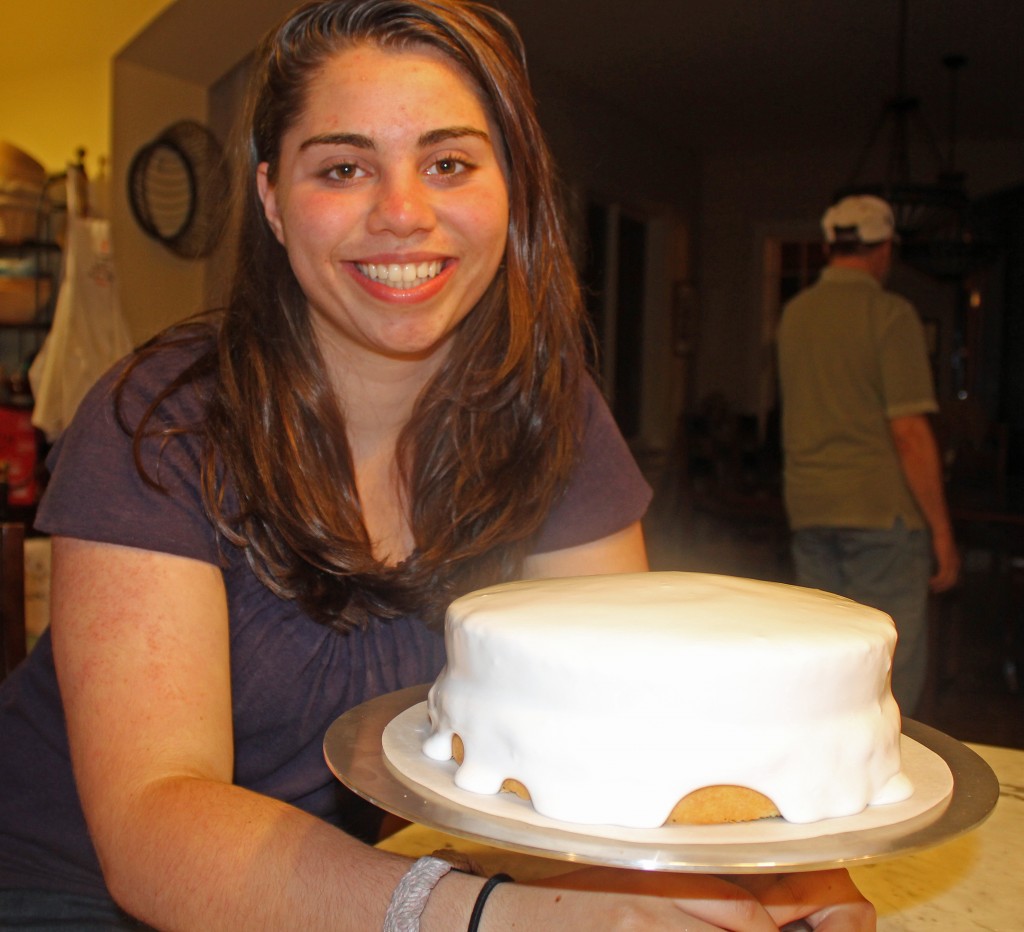
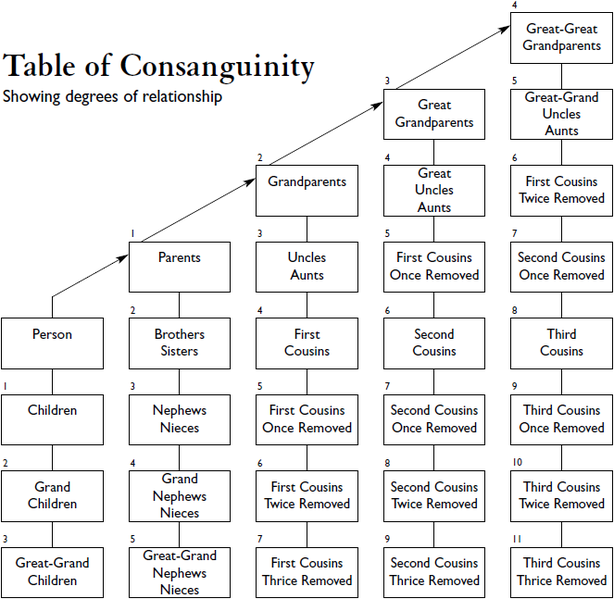
Suzen has a charming first cousin once removed named Emily. That’s her in the picture. What is the “once removed” stuff? Emily is the daughter of Suzen’s first cousin Laurie. So Emily and Suzen are “once removed.”
Confused? Look up “cousins” on Wikipedia. It’ll all be clear. In fact, here’s the Wikipedia “Table of Consanguinity.”
Here’s the important part. Emily loves to bake and her experience has been making cakes from a box.
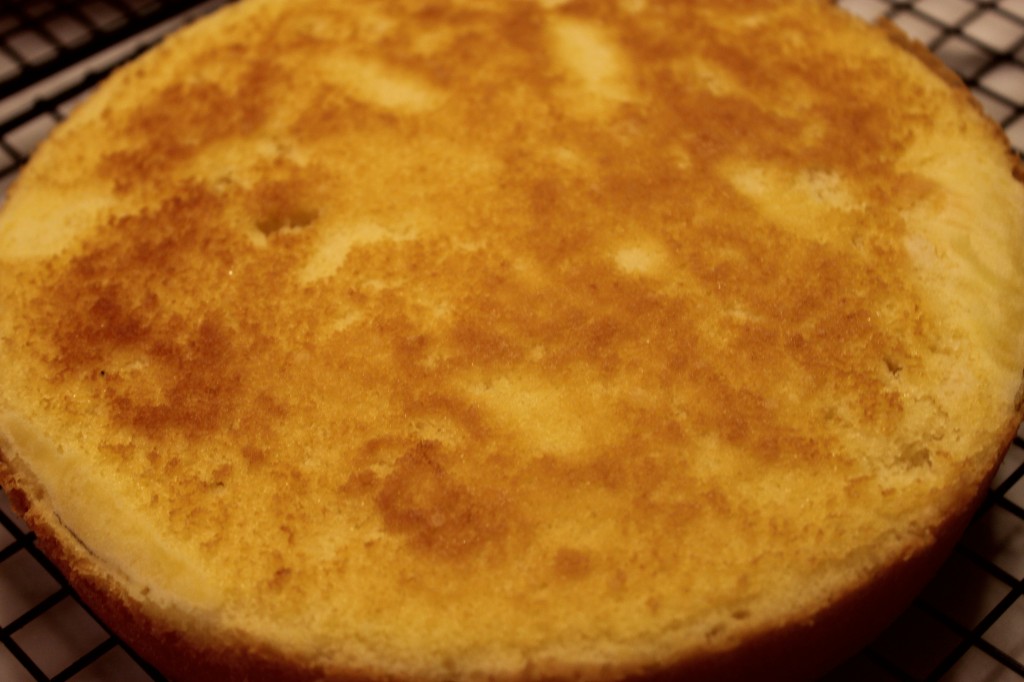
“Time to upgrade,” Suzen said to her. She took Emily by the hand and opened up Flo Braker’s The Simple Art of Perfect Baking. Flo is a baking maven, but this book is mistitled. It should be The Detailed Art for, as you’ll see in the instructions below, Flo gives both an abundance of detail and very serious reasons for every minute step she has you take. Flo is a perfectionist. But her recipes, like this Classic Butter Cake, are masterpieces. If you bake, this is one of those “Top 10” books that you want to use, read, and marvel at.
Now, about that frosting in the picture. It’s an experiment from a different book, which shall be nameless. It tasted fine, but fluffy it was not. We turned to a different book because we had two egg whites left, not the four that Flo or Nick Malgeiri dictate. Lesson learned.
Emily, home from college, was proud of every bite. She deserved to be.
Classic Butter Cake
Yield: two 8-inch layers
Ingredients:
- 2 ½ cup sifted cake flour
- 2 teaspoons baking powder
- ¼ teaspoon salt
- 3 large eggs, room temperature
- 1 cup (8 ounces) milk, room temperature
- 1 teaspoon vanilla
- 6 ounces (1 1/2 sticks) unsalted butter, room temperature
- 1 ½ cups granulated sugar
Preparation:
Baking PreparationsPosition the rack in the lower third of the oven, 5 to 6 inches from the bottom; preheat the oven to 350°F. Using a paper towel and solid shortening, grease the bottom and sides of two heavy-gauge straight-sided 8-inch cake pans. Dust generously with all-purpose flour, shake to distribute, tap out excess, and insert 8-inch rounds of parchment or waxed paper. Ingredient PreparationsPour the flour, baking powder, and salt in that order into a triple sifter. Sift onto a sheet of waxed paper to distribute ingredients evenly and to remove any lumps in the cake flour; set aside. Crack the eggs into a small bowl, and whisk together just to combine the yolks and whites. (This guarantees even dispersion in the batter.) Pour the milk into a liquid measuring cup, add the vanilla, and stir to combine. Making the CakePlace the butter in a bowl of a heavy-duty mixer. With the flat beater (paddle), cream (beat) the butter on medium speed (#5) until it is lighter in color, clings to the sides of the bowl, and has a satiny appearance. (This should take no more than 30 to 45 seconds.) Maintaining the same speed, add the sugar in a steady stream. When all the sugar is added, stop the machine and scrape the gritty, sandy mixture clinging to the sides into the center of the bowl. Continue to cream at the same speed for 4 to 5 minutes, or until the mixture is very light in color and fluffy in appearance. With the mixer still on medium speed, pour in the eggs, very cautiously at first, tablespoon by tablespoon, as if you were adding oil when making mayonnaise. If at any time the mixture appears watery or shiny, stop the flow of eggs and increase the mixer’s speed until a smooth, silken appearance returns. Then return to medium speed and resume adding the eggs. Continue to cream, stopping the mixer and scraping the sides of the bowl at least once. When the mixture appears fluffy, white, and increased in volume (it almost resembles whipped cream cheese and any grainy appearance has disappeared), detach the flat beater (paddle)and bowl from the mixer. (The total process of adding the eggs and incorporating them into the mixture takes 3 to 4 minutes.) Tap the paddle against the edge of the bowl to fee excess creamed mixture. With the aid of a metal icing spatula, lift one-fourth of the flour mixture and sprinkle it over the creamed mixture. Stir it in with a rubber spatula. Then pour in one-third of the vanilla-flavored milk, stirring to blend together. Repeat this procedure, alternating dry and liquid ingredients, ending with the flour. With each addition, scrape the sides of the bowl, and continue mixing until smooth. (Stirring the flour in last rather than the liquid binds the batter together to form the desirable consistency. Doing this by hand rather than by machine gives more control in incorporating the ingredients and reduces the risk of over mixing.) Baking the CakeSpoon equal amounts of batter into each pan, using a large kitchen serving spoon. (When all the batter has been divided, you may weigh each pan to check for equal distribution, which is required for a perfectly symmetrical cake.) With a rubber spatula, spread the batter working from the center outward, creating a slightly raised ridge around the outside rim. (Since heat is conducted faster near the metal rim, mounding the batter around the edges assures more even, level baked layers. Batters containing chemical leavenings also have a tendency to bake higher in the middle, forming domelike shapes; the outer ridge compensates for this.) Bake for 30 to 35 minutes, or until the baked surface springs back slightly when touched lightly in the center and the sides begin to contract from the pan. Cooling the CakePlace cake pans on racks and let them cool for 5 to 10 minutes. With mitts, tilt and rotate pan, gently tapping on the counter to see if each is being released from the metal sides. If not, or if In doubt, run a small metal spatula or the thin blade of a knife between the layer’s outer edge and the metal rim, freeing the sides and allowing air to get under each layer as it is rotated. Cover one of the layer pans with a cooling rack, invert it onto the rack, and carefully lift pan to remove. Slowly peel off the parchment liner, turn the paper over so that the sticky top side faces up, and reposition it on top of the layer. Cover with another rack, invert the layer right side up, and remove the original rack. (Reusing the liner in this way prevents the layer from sticking to the rack while it cools and also provides a temporary base for lifting and storing.) Repeat with the other layer. Then allow both to cool completely. Storing the Cake If you plan to use the cake within 24 hours, wrap the layers individually in plastic wrap and store them at room temperature. To freeze, cover the plastic-wrapped layers with foil. Label each package, indicating contents and date. Freeze for no longer than2 weeks. |
Source: The Simple Art of Perfect Baking by Flo Braker and Dana Gallagher


love your blogs Brian! but this was a tease- need the good icing recipe!!!!
🙂
Fantastic suggestions – I Appreciate the facts – Does someone know where my assistant might be able to get access to a sample a form copy to edit ?