It’s January 14th. How is that New Year’s Resolution to cut down, or eliminate, dessert.
I understand. I have the same problem. You want dessert, but how can you have something healthy. And won’t you be tempted to adorn, say, a healthy cake with “unhealthy” frosting? If you want a healthy cake, Angel Food is the solution. As a kid, I remember my mom opening a box and making this cake, always from the box and never from scratch. And then she would drizzle over chocolate icing made with cocoa, confectioner’s sugar and a little milk.
I can taste it now.
Here’s an option. Don’t use a box mix. Bake from scratch and have enough flavor in the cake itself so you really don’t need frosting. You won’t need it. You will always want it.
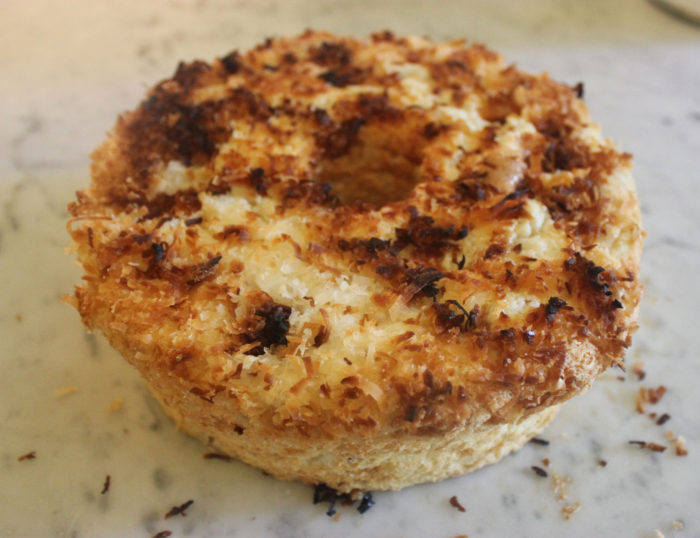
This cake is soft, feathery, and filled with coconut flavor. It’s the perfect dessert that is almost guilt free.
Darn good for breakfast, too.
Ah, this recipe does come with a suggestion for coconut frosting, but Suzi and I just loved the coconut flavor of the cake by itself. By all means, go ahead and frost. Your resolution is shot anyway. And, both recipes — cake and frosting — call for egg whites, which means you now have a dozen egg yolks left over. Egg yolks = rich custard = lots of ice cream. It’s simple math.
We made our cake in one layer in a traditional angel food cake pan. In the recipe below, the suggestion is to bake it in two layers, so that frosting can be used “internally.” I personally prefer one singular tall cake.
Now your resolution is really shot anyway.
White Coconut Cake
Yield: serves 8 to 10
Ingredients:
For the cake:
- 2 ½ cups (270 grams) cake flour
- 1 ¼ cups (250 grams) sugar
- ½ teaspoon kosher salt
- ¾ cup (1 ½ sticks/170 grams) unsalted butter, at room temperature, cut into 2-inch pieces
- 6 egg whites
- 1 cup (240 grams) coconut milk
- 2 cups (240 grams) sweetened shredded coconut
- 1 vanilla bean, split lengthwise
For the frosting:
- 1 ½ cups (300 grams) sugar
- 6 egg whites
- 1 ½ cups (3 sticks/342 grams) unsalted butter, at room temperature, cut into 2-inch chunks
- 1 teaspoon vanilla extract
- ¼ teaspoon kosher salt
- ⅔ cup (160 grams) coconut milk
Preparation:
Position a rack in the center of the oven, and heat the oven to 350 degrees F. Butter and flour two 8-inch round cake pans, or line with parchment paper.
Sift the cake flour into the bowl of a stand mixer fitted with the paddle attachment (or into a large bowl if using a handheld mixer). Add the sugar, baking powder, and salt and beat on low speed for a few seconds to combine. Add the butter pieces and beat on low speed for 45 seconds to 1 minute, or until the mixture is coarse and crumbly.
In a medium bowl, combine the egg whites, coconut milk, and 1 cup (120 grams) of the shredded coconut and whisk until thoroughly mixed. Use the tip of a knife to scrape in the seeds from the vanilla bean into the coconut milk mixture. Whisk until the vanilla seeds are well dispersed. (Reserve the pod for another use. You can slip it into a container of sugar to make vanilla sugar.)
Add about half of the coconut milk mixture to the flour mixture and beat on medium-high speed for about 1 minute, or until combined. Stop the mixer and scrape the sides and bottom of the bowl well. Add the rest of the coconut milk mixture and beat on medium speed for 20 to 30 seconds, or until the batter is well mixed, light, and fluffy. Divide the batter evenly between the prepared cake pans.
Bake for 35 to 45 minutes, or until the tops are firm and golden brown and spring back when pressed lightly in the middle with a fingertip. Let cool completely in the pans on a wire rack.
To make the frosting: While the cakes are cooling, in a small heatproof bowl, whisk together the sugar and egg whites to make a thick slurry. Place the bowl over (not touching) simmering water in a saucepan and heat, whisking occasionally, for 6 to 8 minutes, or until the mixture is hot to the touch. It will thin out a bit as the sugar melts.
Remove from the heat and scrape the mixture into the bowl of the stand mixer. Fit the mixer with the whip attachment and whip on medium-high speed for 6 to 8 minutes, or until the mixture becomes a light, white meringue and is cool to the touch. Turn down the speed to low and add the butter, a few chunks at a time. Increase the speed to medium and mix for 4 to 5 minutes, or until the butter is thoroughly incorporated and the frosting is smooth and glossy. It will look curdled at first, but don’t worry. Keep whipping and it will come together.
Add the vanilla extract, salt, and coconut milk fend whip for another 1 to 2 minutes, or until the coconut milk is thoroughly incorporated and the frosting is smooth. You should have about 5 ½ cups. (Use within 30 minutes, or transfer to an airtight container and store at room temperature for up to 1 day, then beat with the stand mixer fitted with the paddle attachment until smooth before using. Or, store in an airtight container in the refrigerator for up to 2 weeks, then bring to room temperature and paddle again for [6 to 8 minutes until smooth before using.)
Remove the cooled cakes from their pans. Using a long, serrated knife, trim the top of each cake to level it (the layers will have rounded a bit in the oven; the trimmed scraps make great nibbles). Place one cake layer on a cake plate or cake pedestal (if you have a revolving cake stand, use it). Spoon about 2 cups of the frosting on top and use an offset spatula to spread it evenly to the edges.
Carefully place the second cake layer, top-side down (so the even, sharp edges will be on the top of the finished cake), on top. Spoon on about 1 cup of the frosting and spread it over the top and down the sides of the cake, smoothing the frosting as well as you can and covering the entire cake with a very thin layer of it. This is the crumb coat, which will keep any loose crumbs from migrating to the surface of the finished cake. Place the cake in the refrigerator for about 20 minutes to firm up the crumb coat.
Beat the remaining frosting (about 2 ½ cups) briefly with a wooden spoon to keep it creamy. Spoon it on the cake (if desired, reserve a small amount for piping a decorative border) and spread it evenly across the top and down the sides. This is the finishing layer of frosting. Press the remaining 1 cup (120 grams) shredded coconut evenly onto the top and sides of the cake, covering the cake completely. (It helps to tilt the cake with one hand and press the coconut with your other hand.) As you work, hold the cake over a plate or bowl to catch the falling bits of coconut, so you can reuse them. Spoon any remaining frosting into a pastry bag fitted with a small round tip and pipe a decorative line along the top and/or bottom edge of the cake.
The cake can be stored in an airtight container in a cool place for up to 3 days.
Source: Flour by Joanne Chang [Chronicle, 2010]
Photo Information: Canon T2i, EFS 60mm Macro Lens, F/3.5 for 1/30th second at ISO‑1600