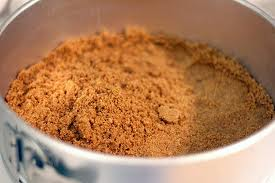
Graham cracker crust is a staple for many pies, particularly the summer pies that will soon be enticing us.
Getting a “crust” ready-made from the store is one option, and a bad one. Those ready-made creatures are often too thin, dry, and stale. They are a poor match for that wonderful pie you are about to craft. It is the combination of filling and crust that creates that total pie experience.
After experimentation, I’ve found a great technique for making your own crust. This crust is thick, not thin, and “rough” with various sizes of crumbs. Eating the crust itself is a treat. You make the crumbs by hand, not in that food processor. A range of crumb sizes, bonded with melted butter and perhaps flavored with spices, creates a matrix of textures and flavors that can complement the pie of your choice.
To make the crumbs, break the graham crackers by hand over a bowl, and then press your fingers into the larger fragments until they are broken. You don’t want to create a uniform powder here. Your goal is a mixture: some powder, some small fragments, a larger chunk or two.
Flavorings? The crust is a template you can play with. The basic recipe calls for adding sugar. Beyond that, you can try:
- A teaspoon of chili powder to compliment a chocolate pie
- A tablespoon of cocoa powder to get a “chocolate-flavored” crust
- A teaspoon of cinnamon if you are planning a fruit pie
- The zest of a lemon or lime if you are making a citrus pie
You can experiment with these quantities and with other flavors. Do go gently with that chili powder, though. You want some heat to accent the chocolate, not put your mouth on fire.
Great Graham Cracker Crust
Servings: One thick crust for the bottom layer of a 9-inch pie
Ingredients:
- 1 ⅔ cups graham cracker crumbs
- 4 tablespoons sugar
- Other desired flavorings, optional
- 6 tablespoons butter, melted
Preparation:
Heat the oven to 350⁰F.
In a medium blow, combine the graham cracker crumbs and sugar. Stir with a fork to blend. Add any other flavorings and again stir to blend.
Add 4 tablespoons of the melted butter and mix with a spoon or, better, with your hands. Depending on the dryness of the crumbs, you may need to add some or all of the remaining butter. The goal is to have the crumbs damp, not wet, malleable but not clumping into ball. You need a mixture you can gracefully manipulate in the pie shell.
Place the crumb mixture in a 9-inch pie shall. Spread the crumbs evenly across the bottom and the sides. To compress the crumbs, use your hands. Or press down with a pie pan of the same size. Make sure the edges have a solid barrier of crumbs all the way to the top.
Place the shell in the heated oven. Bake for 12 minutes and check for doneness. The cooking time should be 14 minutes, but you don’t want a burnt shell. The crust is done when it is heated through and lightly browned.
Place the shell on a cooling rack and let it come to room temperature before using.
If you wish, you can freeze the crust for up to a month before defrosting and using.
Source: Brian O’Rourke with inspiration from Southern Pies by Nancie McDermott

