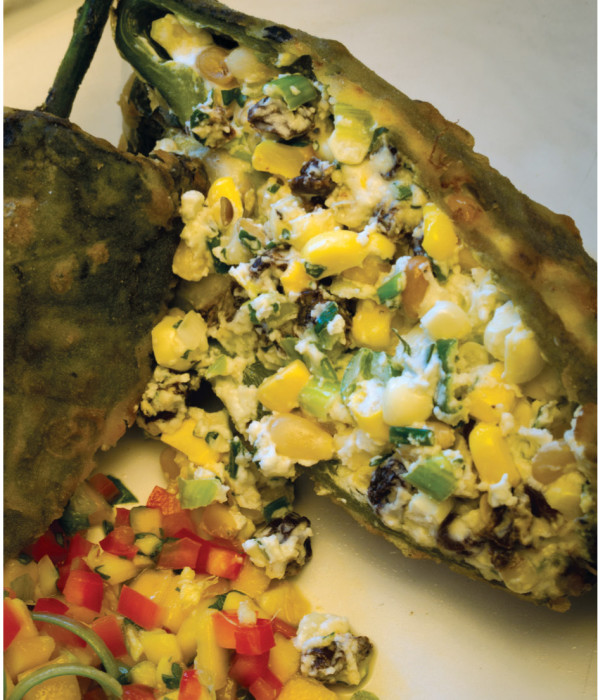
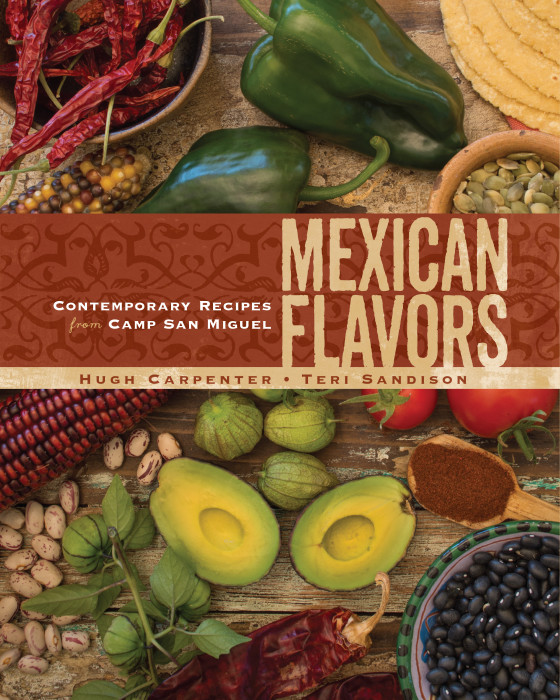
For this week's Throwback Thursday recipe, I wanted a comfort food that was warm, gooey adn captivating with flavor. This chile rellenos provides all that satisfaction. I know, fresh corn is rare now but some frozen corn kernels will surely safice. If you have not looked at the book Mexican Flavors, you have missed a flavor journey you will love. Here's the original post form just last year:
I remember my first time. Well, my first good time. Well, my first good relleno, not really a time. I’d had rellenos a few times before but had never understood why people liked them. My experiences had been greasy, awkwardly flavored, falling apart on the plate. In a phrase: disgusting failures.
In Santa Fe, a couple of decades ago, in a very good restaurant, I took one bite and knew, finally, what makes people tear at the thought of a great chile relleno. Oh, is it “chile” or “chili” or “chilie?” I never know. But in Mexican Flavors by that exceptional team of Hugh Carpenter and Teri Sandison, the spelling is “chile.” I trust Hugh and Teri, chef/writer and photographer both recipes and spelling guidance.
Their latest book, Mexican Flavors, has an entire section devoted to chiles rellenos: different fillings, how to buy chiles, different ways to stuff them, different ways to cook them, how to make a batter if you are deep frying.
This post is going to take you through all the steps to creating that chile relleno pictured above: one elegantly filled with goat cheese, pine nuts and corn. You’ll get the whole survey here: the filling, the cooking methods, the secrets to a most wonderful meal.
Take some time here. Read on and then think about how you just might spend Saturday night. Margaritas are surely an asset here. Hugh and Teri have some tequila ideas in Mexican Flavors, which is another reason to get your very own copy of this very good book.
We’ll start with the filling, then move on to techniques.
[To see a book review of Mexican Flavors just click on this link!]
Chiles Rellenos with Goat Cheese, Pine Nut, and Corn Filling
Background:
This is a time-consuming but grand-tasting recipe. For this reason, involve your cooking friends to help stuff and cook the rellenos. You’ll have more fun doing it together. If you are not serving the rellenos as the main course, then be sure that the other dishes require no last-minute cooking. You can make the filling and stuff the chiles 24 hours in advance of serving. The actual cooking of the stuffed chiles is a last-minute activity.
Yield: 2 cups, enough for 3 or 4 chiles
Ingredients:
- 2 medium ears corn, kernels cut off
- ½ cup dried currants or dark raisins
- 6 ounces soft goat cheese
- 2 whole green onions, chopped
- ¼ cup chopped fresh cilantro, leaves and tender stems
- ¼ cup pine nuts, toasted in a 325°F oven
- 2 cloves garlic, minced
- 1 teaspoon salt
- ½ teaspoon freshly ground black pepper
Filling Preparation:
Combine all of the ingredients in a medium bowl and mix well. Proceed with stuffing and cooking the peppers according to your method of choice.
Seafood Variation:
Make ½ recipe of the Goat Cheese Filling. Add ½ pound cooked medium shrimp or crabmeat or smoked salmon. Makes 2 cups. Proceed with stuffing and cooking the peppers.
Meat Variation:
Make ½ recipe of the Goat Cheese Filling. Add ½ pound finely chopped or shredded cooked meat, such as pulled pork, smoked or grilled chicken, or cooked sausage. Makes 2 cups. Proceed with stuffing and cooking the peppers.
On Buying Chiles and Preparing for Filling:
Poblano chiles are commonly used, but the long, slender Anaheim chiles are also good. Buy poblanos that are evenly shaped with no indentations. Roast the poblano chiles over a gas flame or in a dry cast-iron frying pan until charred. Place in a paper bag, seal, and let steam for 5 minutes. Using paper towels, rub off the charred skins. Be careful not to over-char! There should still be small amounts of the shiny green surface visible. After rubbing off the skin, make a slit lengthwise along each chile. Do not remove the seeds or wash the chiles. If you are going to shallow fry the chiles, it is very important that the chiles are bone-dry inside or else there is the potential during frying of a terrible explosion of water and hot oil.
Considerations about the Filling:
A large poblano holds ½ to ¾ cup filling. An Anaheim or small poblano holds ½ cup or a bit less filling. Due to the short cooking time of the chiles, all seafood and meat must already be precooked. Since each of the filling recipes here makes 2 cups, if you want to serve the chiles rellenos as a main course, you will probably want to double the filling recipe.
Closing the Stuffed Chiles:
It is unnecessary to close the chiles using toothpicks or kitchen string. The goat cheese acts as a binder and prevents the chile from opening during the cooking.
The Batter:
Stuffed chiles that are deep-fried need to be encased in a protective batter. Bring the chiles to room temperature. Just before cooking, using an electric beater, beat 3 egg whites until stiff. Add ½ teaspoon salt. With the mixer on, beat in 3 egg yolks. The batter is a Diana Kennedy technique. Transfer the batter to a 9 by 9-inch Pyrex baking dish.
On Cooking Techniques — Frying, Roasting and Barbequing:
The Frying Method: If you are cooking more than 4 chiles, use 2 frying pans. Place a 12-inch frying pan(s) over high heat. You can do this on the stove, or place the frying pan(s) over high heat on an outdoor gas grill. Pour 3 cups flavorless cooking oil into each pan. Wait until the oil gets hot enough so that the end of a wooden spoon dipped into the oil begins to bubble around the tip. Coat the chiles with white flour. Then, holding the chiles by the stem, twirl them in the batter until well coated. Holding one chile by the stem, place a clean fork under the tip of the chile, and coat the chile with batter. Then lay the battered chile in the hot oil (do not rush—be careful). Fry until golden on all sides and the chile becomes hot in the center, about 5 minutes total cooking time. Transfer to dinner plates, or if cooking two batches, temporarily place on a wire rack. When cooked, serve immediately.
The Roasting Method: This method is for unbattered chiles. Bring the chiles to room temperature. Place the chiles on a wire rack and place in a preheated 350°F oven. Roast until thoroughly heated, about 20 minutes.
The Barbecue Method: This method is for unbattered chiles. Bring the chiles to room temperature. Prepare a medium-hot fire in a gas or charcoal grill. You’ll need a double layer of aluminum foil, about 12 by 12 inches, with one side sprayed with nonstick cooking spray. Place the foil over direct heat with the oiled side up. Place the stuffed chiles on the foil. Cover the grill. Cook until the chiles are piping hot, about 15 minutes. To add more flavor, place 2 cups of hardwood chips directly on the fire before beginning to cook. When the chips begin to smoke, place the chiles on the foil and cover the grill.
Considerations on Serving:
Make 1 chile per person as a first course and 2 chiles per person as a main course. Make one of the salsas from pages 17–20. Place the salsa on your dinner plates. Place the chiles on top of the salsa and serve at once.
Optional Garnish:
If you want a more complex taste and a greater visual flair, drizzle on one of the Zigzag Sauces (page 30 in the book, another reason to buy!) or some crema.
Source: From Mexican Flavors: Contemporary Recipes from Camp San Miguel, by Hugh Carpenter, Teri Sandison, Andrews McMeel 2014


